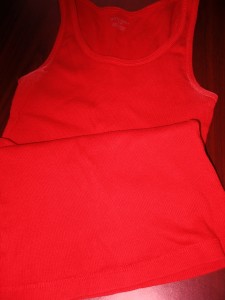
 I thought I took a before picture, but I guess I didn’t. This is a picture of a similar shirt I have. It’s a bit thinner and longer than the one I redid, but it’s the same bright red color exactly. Usually these reds don’t dye a true purple. They tend to come out more reddish purple and so it did.
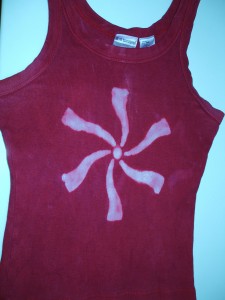
After I left it in a purple dye for a while, I taped a round plastic stencil over the front and applied the Clorox Bleach Pen to the inside of the design. The stencil isn’t firmly on the fabric so you do have to be a bit careful when you squeeze the gel bleach onto the pattern. Although since it is a gel and not entirely liquid, it’s a bit easier to do.
I waited until it was dry (about 20 min) and then rinsed the bleach gel off the front and allowed it to dry. I actually decided to use the ARIDzona sun instead of putting it in the dryer so the powder marks you see are what got on the shirt after hanging it on my pool fence. I wiped them off so you don’t see them on the shirt but the camera picks them up anyway. I suppose I could wash it before I took another picture, but I’m doing so many things this week and I wanted you to see the results today.
This purple project employs the three things I have been working with the past several weeks: dye, stenciling and the bleach pen. It was fun to do and fairly easy. The hardest part of this purple craft was getting the picture to come out without the white powder marks on them. lol
Hope you enjoyed this one and please share if you have tried any of my ideas and how they turned out.
Have a GRAPE Day!
